FAQ
RC1 Remote Kit – ZRC1-CKT-XY-F
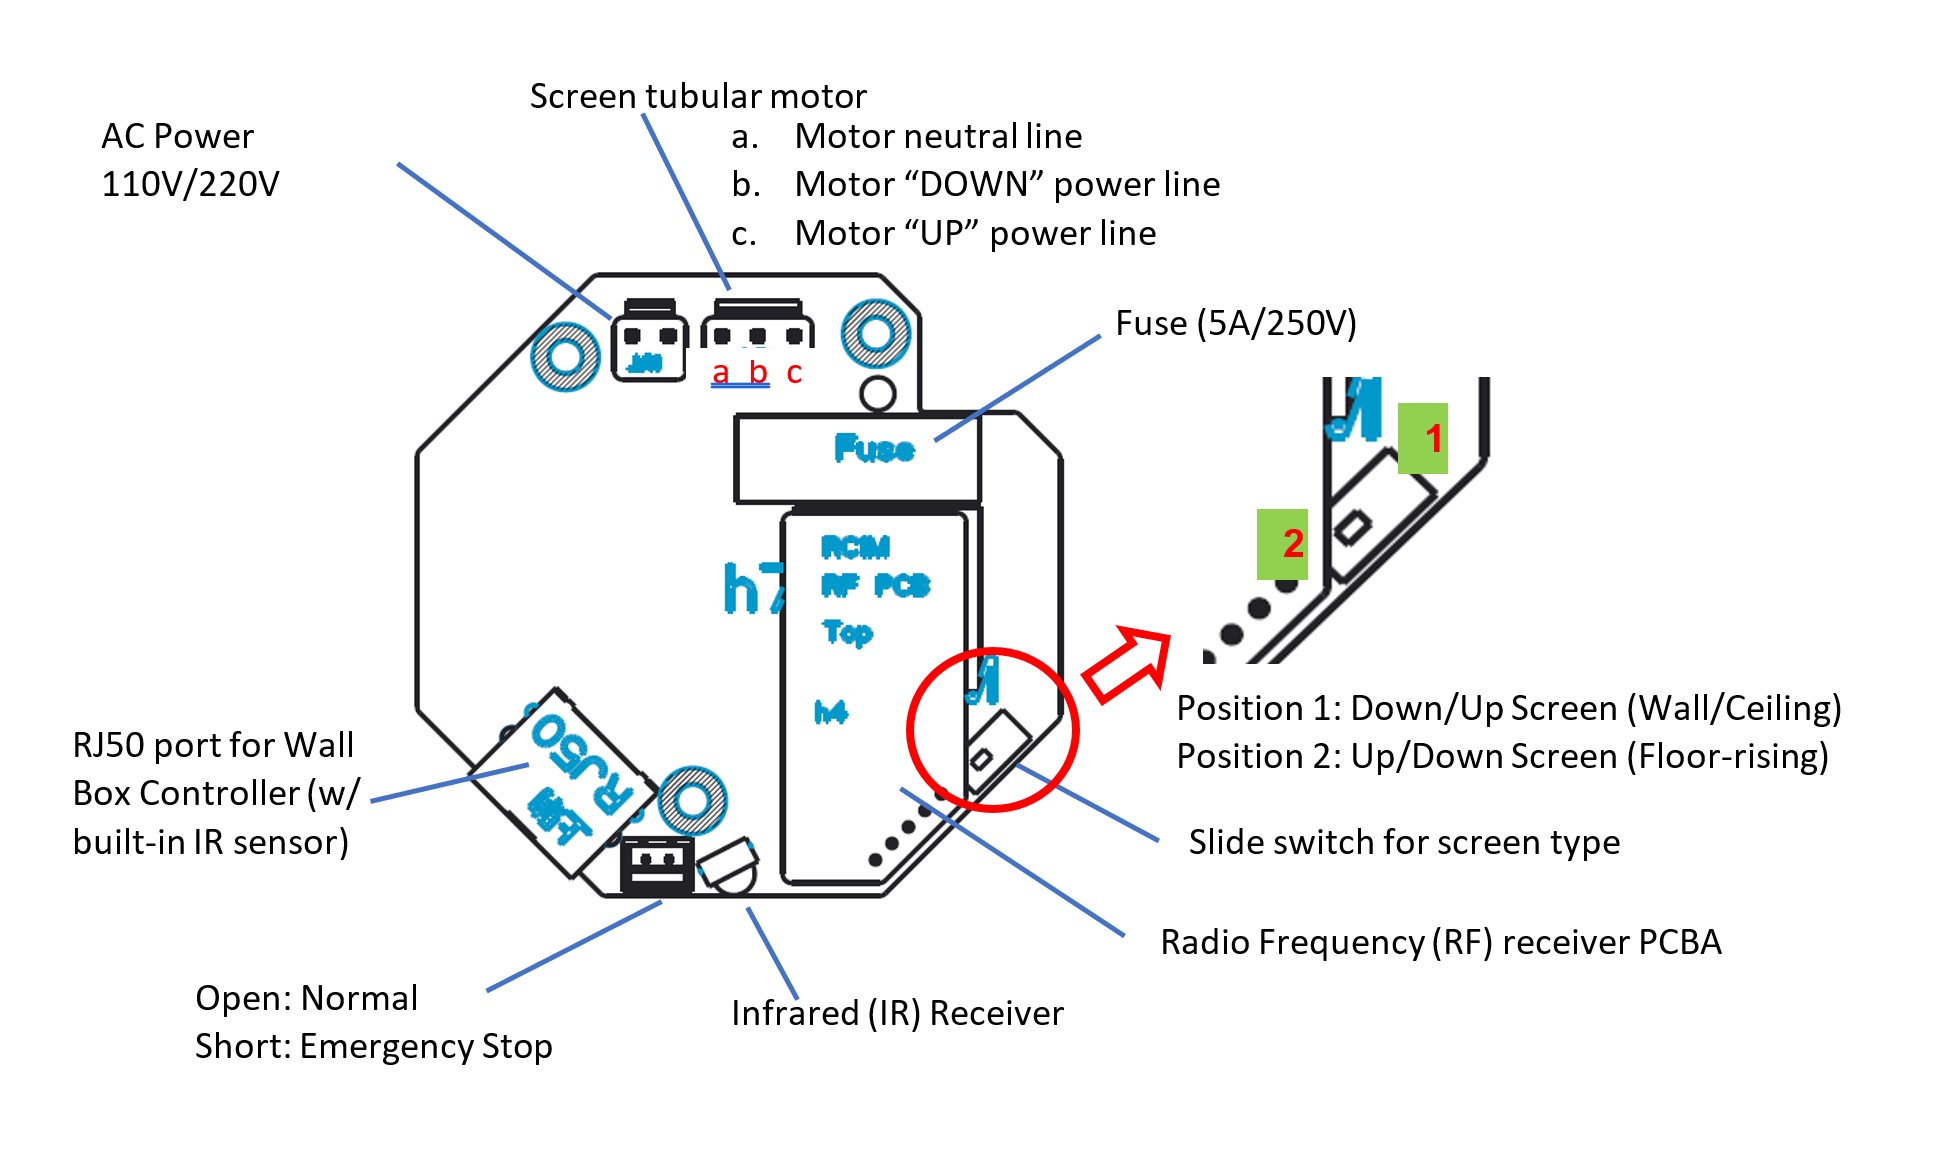
A: Please reference the circuit board layout below.
Circuit Board | ZRC1-CKT-X
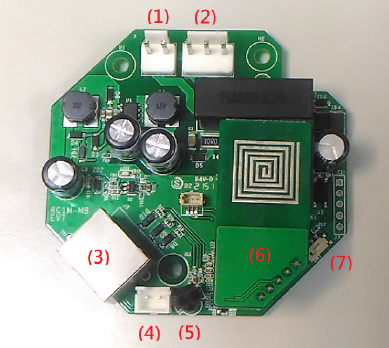
- Connection port for 110V AC Power
- Connection port for electric screen tubular motor
- RJ50 port for connecting wall box controller
- Emergency stopper
- Infrared signal receiver
- Radio Frequency signal receiver
- Switch for selecting screen type
- Position 1 (Right) = Down/UP Retractable Wall/Ceiling Screen
- Position 2 (Left) = Up/Down Retractable Floor Screen
A: The effective beam range 20 ft (6 M) within a 30° angle.
A: The exact radio frequency range of the ZRC1-RF is 433.93 MHz.
A: Follow the directions below to synchronize/pair a new ZRC1-RF remote.
Note: The wall box controller is needed for this operation.
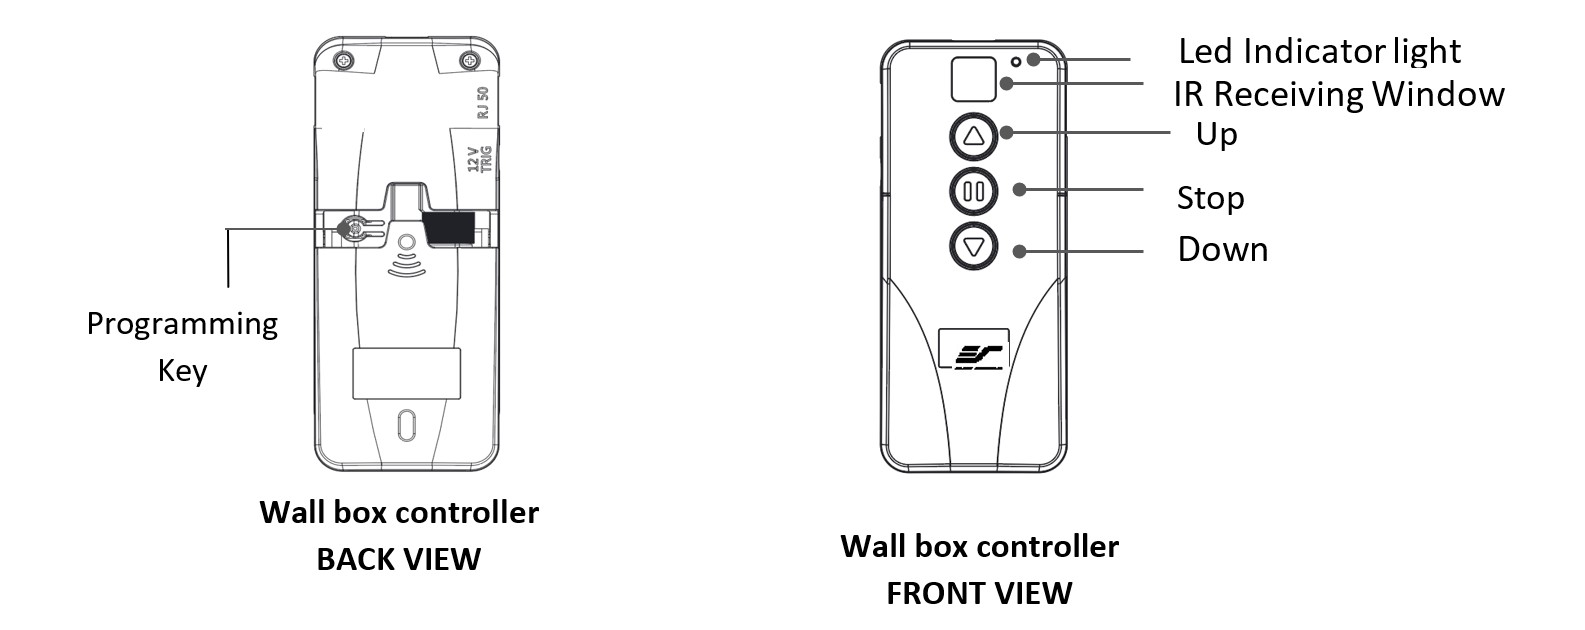
- Press & hold the “Programming Key”, then press the “Up Key” on the Wall box controller (wall-box LED indicator light flashes).
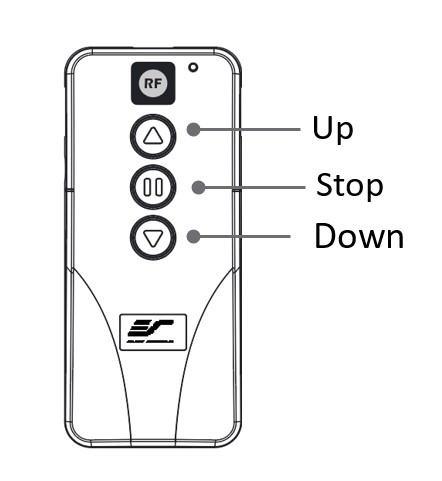
- Then press the “Up Key” on the RF remote
- The Wall box LED indicator light will flash 5 times to indicate the RF remote has been properly synchronized/paired.
A: Yes, the ZRC1-RF Radio Frequency remote can be programmed with its own unique code to control multiple screens by changing the RF code as described below.
How to change the RF code
- Remove the batteries
- Change the RF code switch
- Insert the batteries
- Synchronize it with the wall box controller
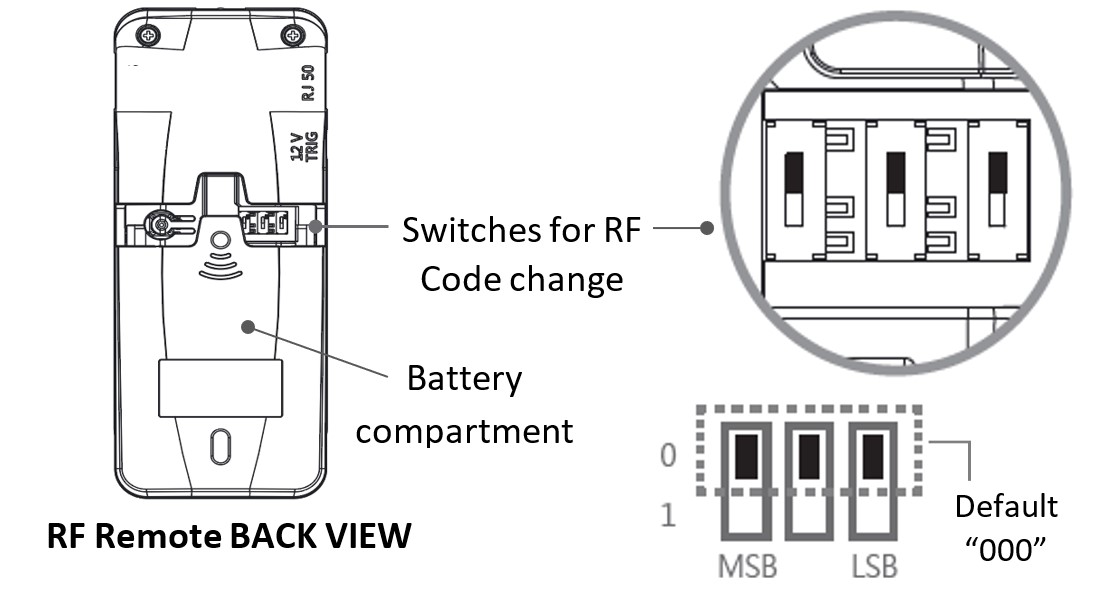
A: Yes, please follow the steps below to change the Radio Frequency code.
How to change the RF code
- Remove the batteries
- Change the RF code switch
- Insert the batteries
- Synchronize it with the wall box controller

A: The ZRC1-IR codes are as follows.
- UP_KEY = 0x07ED112B
- STOP_KEY = 0x07F519C3
- DOWN_KEY = 0x07DD089B
How to use the wireless 5-12 volt trigger feature
Requires a 3.5mm to 3.5mm mono cable (not included).
The Radio Frequency (RF) remote control serves as a dual purpose, independently as a handheld remote control, or as a Wireless 12-volt trigger. The radio frequency technology sends a wireless signal that synchronizes the screen’s drop & rise with the projector’s power cycle.
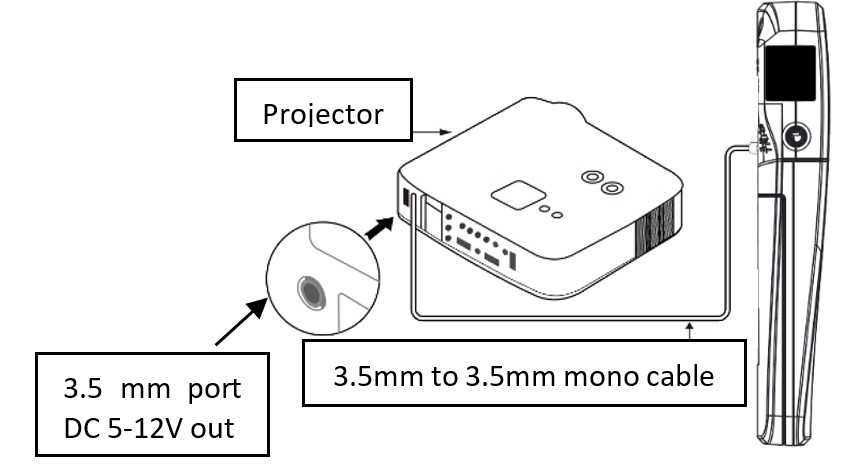
Step 1: Connect one end of the 3.5 mm mono trigger cable to the RF remote.
Step 2: Connect the other 3.5 mm mono end of the cable to projector.
- Projector on, screen drops
- Projector off, screen raises
Please be aware, the projector on/off cycle may take longer to fully activate. It usually takes around 20- 30seconds for full off and on cycle each time.
Note: If the wireless trigger feature does not work, please resync the RF remote to the Wall box controller per the instructions in the Radio Frequency remote section.
